Thursday, November 21, 2019

7 Ways to Use Task Cards to Make Your Classroom AWESOME!

Task cards are one of my all-time favorite classroom tools. They serve so many purposes and can be used in so many ways to meet the individual needs of your students. I’ve used them in both my science and math classes as well as at the middle school level and the community college level. They are a wonderful alternative to a classic worksheet, and most of the time, students do not even realize that they are learning and working!

What Are Task Cards?
They are pretty much what they are called. They are cards that have tasks for students to complete. The tasks could vary greatly, ranging from identifying a definition, to drawing a graph, to creating a weather instrument. Students can record their answers or complete the tasks in their notebooks, on a pre-created answer sheet, on whiteboards, and more. The possibilities with task cards are truly endless, and I personally have an obsession with them!

How Can Task Cards Be Used in Your Classroom?
Around the Room/ Scavenger Hunt
This is the option that I choose to do most of the time and that I feel is one of the easiest ways! You can take the task cards and place them all around the room. It could be on desks, taped to the wall, on the counter, wherever! Your students can start at any point in the room, if you have a pre-made answer sheet, and go around the room until all of the task cards are complete. You can have students work as individuals or in partners. This is a great opportunity for you to walk around the room and help those students in need, or stick around where the more challenging questions are placed. My students LOVE to get out of their seats to do their work. They almost forget they are learning. To make it even more engaging, you can hide a few cards that they will have to search for. Make learning fun!

 7th Grade Introduction to Probability Task Cards


Centers/Stations
This is a fairly simple way to use task cards and is great when you are looking for activities to place in your centers, whether it be a science center or a math center. It’s very easy to set up, and students love to sort through cards. You could choose to place task cards at one center/station, depending on what else you have, or you could have stations all around the room with 4-5 task cards at each station, and students can rotate around the room until all centers/stations are complete.


Differentiation
There are multiple things that you can do to use task cards to differentiate. One thing you could do would be to sort your task cards by difficulty level and have the students work in levels. Once they finish the first set of task cards, they can move on to the next level. You could also use them as formative assessment, or as a pre-test, to determine your students' individual needs. From there, you can differentiate your lessons.

Early Finishers

This is a super-easy way, and a super useful way, to use task cards. If you have an “early finishers” section in your room, you can set task cards up for students to complete when they finish their work. They are great for extension and extra credit! I like to laminate mine and place them on a binder ring.

Test Prep
I personally have created my math task cards to cover every single standard for my state. We use the Common Core Standards. For science, we have the NC Essential Standards. If I align my task cards directly to the standards, I know that I am not missing a single thing that my students need to learn in order to be successful by state standards. Using task cards for test prep is awesome! I know that, in the past, I have been in a panic about what I needed to do to review all of the standards that I covered for A WHOLE YEAR before the test. Task cards are a great way to do this.


Spiral Review
Don’t like to wait until the end of the year to begin reviewing? Me neither! Task cards can be used for a spiral review. You can have students complete task cards throughout the year, covering different standards, so that the content stays fresh on their mind. They will not even realize if you use the same card twice!

Partner Games
Make a game out of it! You can set students up into partners, have students complete a task card individually, and then have them compare their answers. If their answers are different, they are able to discuss it. This is great for many reasons. First, it is self-checking. If students do not get the same answer, they are forced to go back and figure out what they did wrong. Second, research shows that when you teach someone, the material sticks better. It’s a win-win situation. Who doesn’t love a game? Set a timer, play some music. Make it fun!

Friday, July 15, 2016

Nutella Coffee

Although teachers have a TON to do in the summer, we do have a little free time. My goal for this summer was to learn some fancy new coffee tricks! I have spent way too much money at the coffee shops, so it was time I learned to make the sweet coffee myself.

One of my favorites I have made so far has been Nutella Coffee. This will definitely be a part of my morning routine when school starts back. If you have a self-serve blender, it's a breeze!


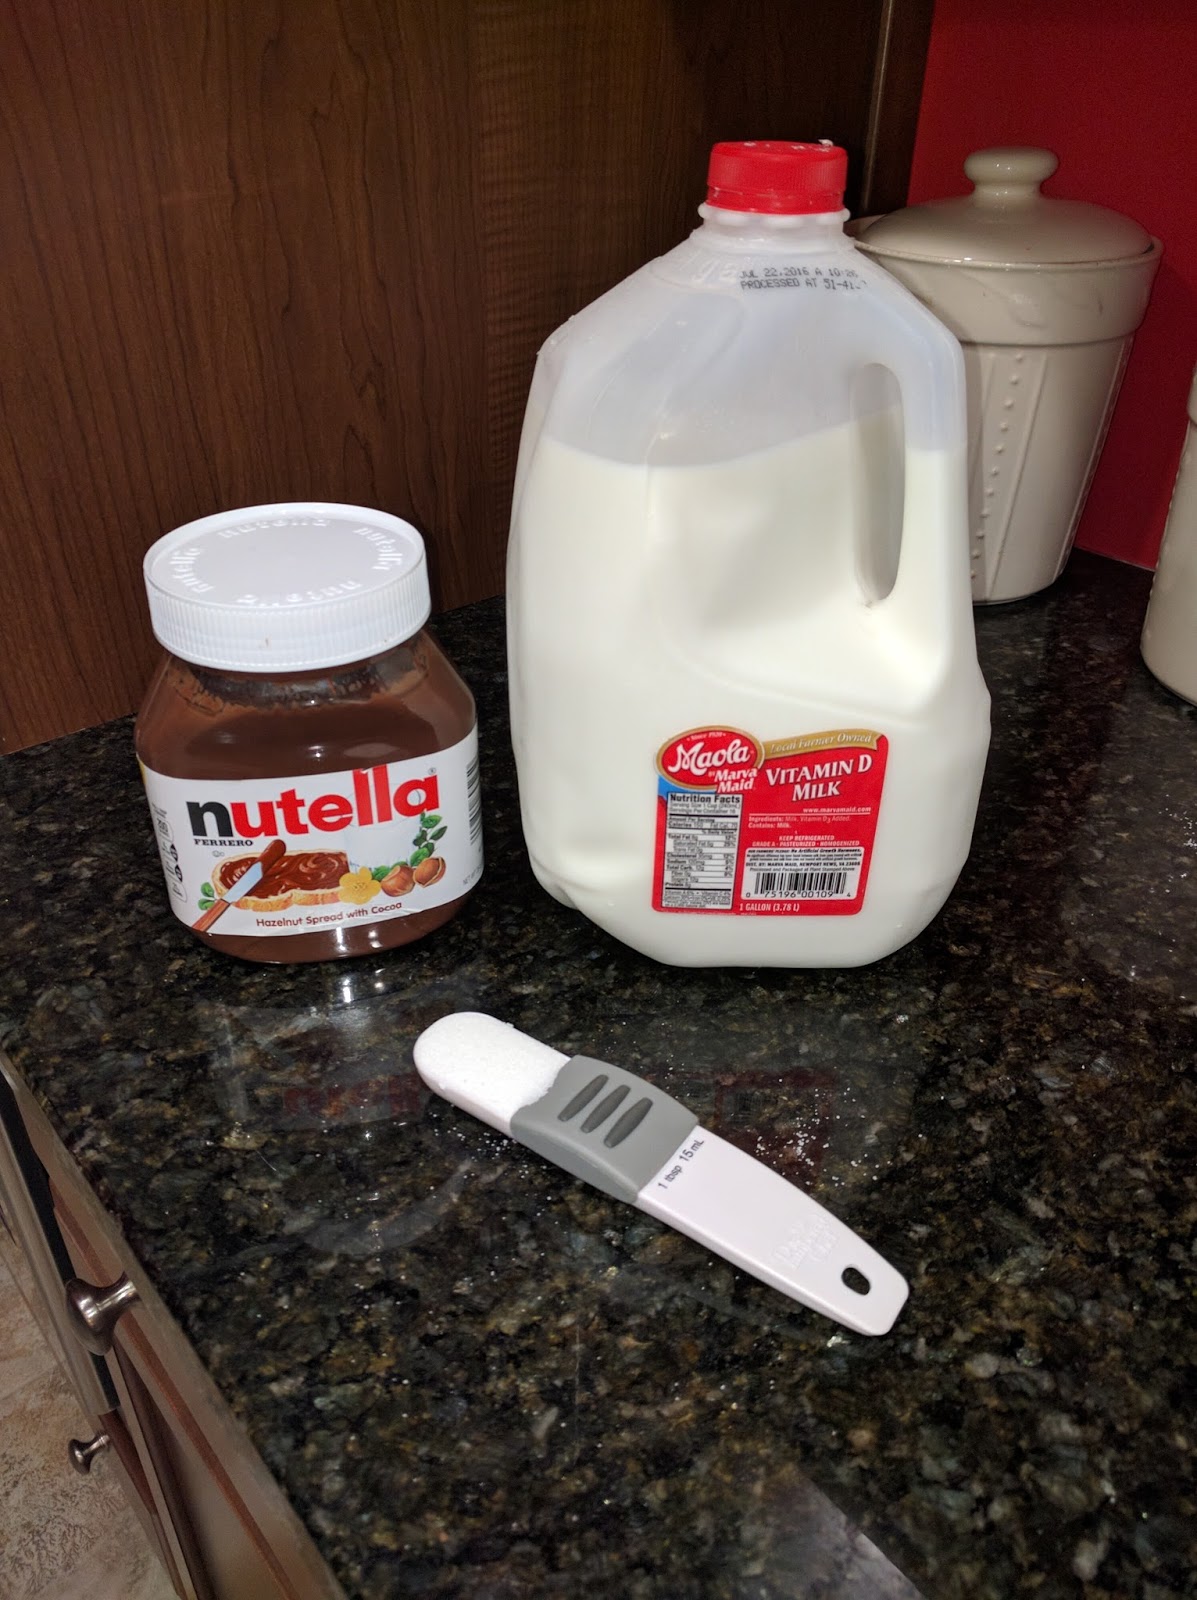
This is what you will need: 

2 tbsp of Nutella
Cup of Brewed Coffee
1/4 Cup Milk
1 tbsp of Sugar


Just throw all of the ingredients in the cup and blend! You can adjust the amount of milk/sugar as needed. I like my coffee super sweet! It does not take long to blend. Just blend until smooth.


Once blended, throw in a coffee cup and enjoy! This is one of my absolute favorites!

Thursday, July 7, 2016

Citizen Science

One of the most significant things that I have done as a science teacher is implement a citizen science lesson. If you have never done a citizen science lesson in your classroom, I highly recommend it. I had a special opportunity when implementing my lesson, but there are SO many lessons out there to choose from that you could find to fit perfectly into your classroom.


I had the opportunity to be a part of the Kenan Fellows in the 14-15 Cohort in North Carolina. I was able to work with a mentor at the NC Museum of Natural Sciences to study Demodex Mites (mites that live on us!) ...yes...100% of us! As a Kenan Fellow, me and "team mite" had to create a curriculum from our experiences and then implement them into our classroom. Creating the curriculum was the most challenging task that I faced during the Kenan Fellows program, but at the same time, it was one of the most exciting! One of the challenges me and another team member faced was fitting the Demodex mites experiment into the 7th grade curriculum. It fit well into the 8th grade curriculum, but 7th grade was a stretch. It worked nicely while teaching scientific inquiry, which is the direction that we went in; however, science inquiry isn’t tested in 7th grade, which can cause issues with pacing. 


The most exciting thing of all was implementing the curriculum!! I truly built up the mite lab that we were going to do in class. I implemented my curriculum at the beginning of the year, so I barely knew my students. This was a wonderful introduction to my science classroom, and my students had a ball. We have the results of their question, “Do Middle School Students Have Mites?”. My mentor and other researchers know that these mites are on 100% of adults, but they do not know much else. As a class, by students swabbed each others faces to hopefully get mite DNA. We sent the swabs back to my mentor so he could analyze the data. My students were able to do REAL science in REAL time. The data was very valuable to my mentor. The students were also super into the lesson. They asked almost everyday over the year, "Do we have mites?", and we found out...they did! Not all of the tubes showed mite data, but this brought up more questions and conversations. Science never ends!

If you are interested in looking at other citizen science projects for your classroom, here is a link to an awesome site with many resources! SciStarter

Monday, January 12, 2015

Tablets in the Classroom

It's been a while since I have shared anything, but as you all know, teaching can get a little hectic!! However, I wanted to take a moment to thank all of those that donate to Donor's Choose. Just recently, I have received 5 Samsung Tablets through Donor's Choose. Although this is nowhere close to a class set, I have seen what just having 5 in my classroom has done.

We have a little bit of technology in our school, not as much as others, but we are blessed with what we do have. As far as I know, my tablets are the only ones in our school. I plan to do a lot with them, but as for now, I am just using them for "when you are finished" tools, and students can use these to play on the science apps I have downloaded.

I thought that my students may think that was sort of "lame", but I couldn't believe what a motivational tool that it has become. Students that usually may delay their start in their classwork are actually starting on time and completing their assignments correctly.

I am just so thankful to have these to use a motivational tools for my students. I cannot wait to see what else they may bring to the classroom!

Saturday, September 20, 2014

Using QR Codes for Notes

I really wanted to use QR codes in some way this year. I created a QR Scavenger Hunt to begin my lesson on the Ozone Layer. I was really curious to know how it was going to go, and then I discover, the kids loved it! 


I created it for individual use at a desk and also for an "around the room" type scavenger hunt. I decided to just have the students sit at their desk and work on these individually.


Students used the app Scan on the iPods to scan QR codes. The QR codes lead to short descriptions about the ozone layer that students recorded on their note sheet. Later, student glued their note sheet into their interactive notebooks. I also had a few students use their smart phones. The students were SOOOO excited to use the iPods as well as their cell phones to take notes. You could tell they never did anything like this before, and they want to do it again. It's funny how I tricked them...they were just taking notes :)

This activity is in my TpT store, and I definitely plan to create more!
http://www.teacherspayteachers.com/Product/Ozone-QR-Scavenger-Hunt-1394909

Thursday, August 7, 2014

Lesson Reflection Ball

I have spent the past few weeks thinking of easy things that I can do to make class a little more interesting. One of those things that I decided that I was going to do was to create a Lesson Reflection Ball. Can anyone name a kid that doesn't like to throw things in class? Didn't think so.

I just went to Wal-Mart and grabbed a rubber ball for $2.50, and started coming up with some questions. There where many different colors to choose from! It was bigger than I thought it was going to be, so that meant more questions, but I finally came up with 35.

1) What is one thing that you learned today?
2) What are some ways you could share this learning with your parents of family?
3) Why do you believe we’re studying this objective?
4) What’s one thing the teacher did for this objective that you really liked?
5) What is one question you have after today’s lesson?
6) Name 3 things you learned today.
7) What is one thing you found interesting in the lesson today?
8) What is something that stuck with you today?
9) Create a question based off of today’s lesson.
10) Name at least 3 vocabulary words dealing with today’s lesson.
11) What is one thing you knew about the objective before today’s lessons?
12) Today I learned about _________. I still have a questions about ____________.
13) What was the main idea of the lesson today?
14) How will this lesson relate to the real world?
15) Tell three key ideas from the lesson today.
16) Create a metaphor about today’s objective.
17) Today’s lesson: who, what, when, where, and why?
18) Sum up today’s lesson in one single sentence.
19) My favorite thing about today’s lesson was ______________.
20) Make up a true/false questions based off of today’s lesson.
21) I want to know more about ______________.
22) Make up a multiple choice question based off today’s lesson.
23) What was the easiest part of today’s lesson?
24) What was the hardest part of today’s lesson?
25) If you had to teach today’s lesson to another student, could you do it?
26) Identify the most important concept to know to understand today’s lesson.
27) How will you remember today’s lesson?
28) How did you make sense of today’s lesson? Explain.
29) Explain today’s lesson in your own words.
30) Could today’s lesson apply to another subject? How?
31) Give me 5 vocabulary words from today’s lesson. Go!
32) Make up a fill-in-the-blank question based off of today’s lesson.
33) What can you do to study the material you learned today?
34) Did you learn anything that surprised you today?
35) How might today’s lesson help you?

I can't wait to use it in class! It's perfect for that last minute or two before the bell rings.


Friday, August 1, 2014

Beginnings and Word Walls!

I cannot believe that the school year is almost here! Teachers go back in 17 days..wow! Where has my summer gone? Of course, always a teacher, I have been working on decorations for my room, and I decided that it was time to update my science word wall! I have added SO many more vocabulary words. I now have 128 vocabulary words for my word wall. I knew that my students looked at them so much last year, and they were fascinated with the pictures. When I'd ask a question that they didn't know, they would look at the pictures on the word wall cards to try to figure it out, so I knew I'd have to keep this curiosity going, so I created more! If you have already bought my science word wall cards, you will be able to print the update for free. If not, you can download them at TpT. They are perfect of 7th Grade NC Essential Standards.


TpT is also having a sell on August 4th and 5th. All of my products will be 20% off!


Sunday, July 20, 2014

Beginning of the Year: Using Teacher Memes

I thought I was so clever when I decided I wanted to use teacher memes to go in my "Beginning of the Year PowerPoint" to introduce rules and procedures; however, I saw that this was not my brilliant idea, but other teachers have already done this!

Even though I was not the one who came up with this great idea, I thought I'd share a few ideas just in case someone would like to incorporate it in their classroom.

Here are a few slides of my "Beginning of the Year PowerPoint" that I will be using in August.


Here is a link to my Pinterest page where I pinned all of the memes I used in my presentation! I can't wait to show my students!

Saturday, May 31, 2014

End-Of-Grade Test Time

I just cannot believe that next week, it is time for my students to take their End-of-Grade Assessments. This year has flown by! My students have been quite nervous because they have big tests in Math, Reading, Science, and Social Studies.

To make this a little less stressful for them, I got a little "pinteresty" and made an EOG survival kit for my math students and made something small for my science students. On the back of my survival kits, I also left a sweet message. They were so happy!


Monday, April 7, 2014

Finding Surface Area

I am only in my third year of teaching, but I know that in the past, my students have always had trouble with surface area. I had to come up with something new this year to help them understand what surface area ACTUALLY is!

I started taking a bunch of pop cubes and putting them together to make 6 rectangular prisms of different sizes. I then put my students into 6 different groups.

I began to explain that surface area is the area of all of the sides added ALTOGETHER! I explained that it was like trying to figure out exactly how much wrapping paper you would need to wrap a present. To find the surface area of the rectangular prism pop cubes, students had to count the squares on the top and bottom, left and right, and front and back sides, then they had to add them up together to find the surface area.

I gave the groups about 2 minutes to find the surface area of the rectangular prism, then students rotated the prisms clockwise to the next group.

After we finished this activity, we moved to nets and then to other prisms and pyramids!

It was like a light bulb turned on when they got it!


Wednesday, March 12, 2014

Life-Size Respiratory System Model

I absolutely love teaching the body systems! There are so many neat things that you can do to teach them. There are so many questions that the students come up with that make it fun as well.

For the beginning of our Respiratory System lessons, I decided to let my students make a life-size model of the respiratory system. This allowed them to get familiar with the parts while moving around and enjoying class.

I put them into groups of four. Each student had a job. Students were to trace an outline of someone in their group and then draw and label specified parts.

Jobs:

1) Materials/Piece of Art – in charge of gathering materials needed and will be the person getting traced. Responsible for helping the recorder.
2) Time Keeper – Make sure to get the task done within the allotted time; Will also be in charge of helping the artist.
3) Artist – Draw the respiratory system .
4) Recorder – The recorder will write down the functions for each body part and will be responsible for telling the rest of the group.

Students were given a textbook picture of the respiratory system to go by. They were to draw and label the following respiratory system parts:

1) Nose
2) Pharynx
3) Larynx
4) Trachea
5) Bronchi
6) Bronchioles
7) Alveoli
8) Lungs
9) Diaphragm

It was so funny to see the students doing this. It was also funny seeing how big the outline of the body became because the artist was too afraid to get close to the person being traced.

Here are some of examples of my students' work.


Wednesday, February 26, 2014

Sale Sale Sale!!

If you haven't heard yet, Teachers Pay Teachers is running a sale 2/27-2/28. It's starting tomorrow!!

EVERYTHING in my store will be 20% off plus the TpT discount.

I know I"ll be buying some items as well!


Sunday, February 23, 2014

Cell City

I wish I could say that the idea of cell city was my own, but this is definitely not true. I have no idea who come up with the idea first, but Google helped me put this project together for my students.

I gave my students the options of building a model of a cell city or a drawing. They had to include the important organelles (they were given a list) and everything had to be labeled. This was my first year doing this, and I was very excited!

There were a few things I would change:

1) I placed students into groups of 4. I wish I would have assigned them to certain "jobs".
2) This was an in-class project, so I wish I would have emphasized time-management a little bit more.
3) I also teach math, so my tables are in rows. I wish I would have taken the time to place the tables into groups to prevent group-to-group conversations.
4) I told my students the cell city analogies, and I wish I would have given them the opportunity to come up with the analogies on their own, or at least try to match them.

If you plan to do a cell city, take the time to plan it out, and you will be grateful for your results!

Here are pictures of my students' work!


Saturday, February 1, 2014

Lever Lab

Now, I love all science, don't get me wrong, but I am super excited about starting the biology unit with my 7th graders! It's my all time favorite. Hopefully I will be doing a lot of exciting activities in this unit so that I can share!

We ended our physical science unit with simple machines. There were so many things we could have done with this unit, but with the lack of time we had to choose one activity. We chose to do a lever lab! It was a very simple lab, but covered the important concepts of levers.

We first gave the students a stack of 5 pennies (taped together), a ruler, and they could use a pen or pencil. They used this to construct a lever.


The objective of the lab was so that students will understand the relationship between effort force, resistance fore, and the location of the fulcrum. In this lab, the pennies represented the resistance force, the student's finger representing the effort force, and the pen represented the fulcrum.


Students would follow these steps:

1. Construct a lever using the ruler as the straight bar and the pen as the fulcrum.
2. Place the pen beneath the ruler at the 6 inch mark. Place the stack of pennies over the 1 inch mark.
3. Push down on the 12 inch mark on the ruler. When you push on the ruler, you are exerting an effort force.
4. Move the fulcrum to the 8 inch mark and repeat step 4.
5. Move the pen back to the 4 inch mark and repeat step 4.


And then, we students were to answer these questions before discussion:

Conclusions:
     1) How did your effort force differ between the three trials?

2) Explain how increasing and decreasing the distance between the effort force and the fulcrum affected the effort force.  What type of lever is this?


3) How does this relate to where you push on a door when opening it?


Also, I will be throwing a SUPER BOWL SALE on my TpT websites as well as my TN site.

My Teachers Pay Teachers sale will run from 2/2-2/3 and will be 20% off!!!

My Teachers Notebook sale starts today 2/1 - 2/3 and will be my 20% off plus an additional percent off from teacher's notebook!


Wednesday, January 22, 2014

Science Fair

Our school just finished up our science fair. All of our projects were due last Friday, and I'm so proud of my students' work! They did great!

Along with the posters, some of my students brought in part of their experiments, even though I told them not to. I really didn't have room for any other items besides the posters and reports, but I'm glad a few brought them in. We had a ball!

I had a student bring in their electromagnet they created.


We also had a lava lamp.


We had a plasma ball!


This was one of my favorite boards. Super girly! Unfortunately, it did not place. We figured it needed more data, and also, the pictures should have been taken in the same lighting. But no matter what, it is a fantastic poster!!


Thursday, October 31, 2013

Water Cycle in a Bag

In science class the other day, we did an activity based on the following YouTube video!

http://www.youtube.com/watch?v=4WQBtAJxMbY
- thanks for creating this video (side note)


The activity all together was fun, engaging, and the students really enjoyed it. It's a very cheap activity to do, and, I want to add, out of all of the content I have taught this year, I believe they understand the water cycle the most.

This is the order in which I conducted my activity:

1) I showed the first part of the video where the instructions were given.

2) I passed out zip-lock bags, poured water in the bags, and then went around with the food coloring.

3) As I was pouring the water and food coloring, I had 2 students assist in taping the bags to the window. (I only allowed four students at a time to go to get their bags taped.)

4) While the bags were on the windows, I had the students answer the following questions:
          -Write a hypothesis to explain what you think is going to happen to your "water cycle".
          -Draw a picture to represent your hypothesis.
          -Explain the reasoning behind your hypothesis.

5) I also had a mini-lesson explaining evaporation, condensation, and precipitation using a burner and a pot! They loved to see me make it rain with the lid!

6) We went to observe our bags and then had a discussion about what happened.

7) We finished the rest of the video and compared our bags to the video's bags.


Overall, it went well. Our bags never did much due to the fact that the sun was not out most of the time, it was cold, and I teach 45 minute classes! However, it made a GREAT discussion when I asked them why our bags didn't look like the video.

Monday, October 21, 2013

Number Lines

In math class the other week, my class did an activity that I really think helped my students understand converting fractions and decimals as well as placing them in order from least to greatest.

I cannot take credit for this idea because it came from our math book, but although it was very simple, my students enjoyed it.

My students were placed in groups and given a long piece of duct tape. They had to label the tape from -2 to 2 and count by halves. They were given several problems with about 5 decimals and fractions in each problem. Students had to convert the numbers into fractions or decimals to make it easy to place them in order from least to greatest. After they did the math, they had to physically show me on their number line the order that they would be in. They did a great job!


Tuesday, September 10, 2013

Great Start to the Year!

I am having a great start to the year! I just began the third week of the school year, and it has been a blast. I really wanted to share some of the things that are going on in the classroom.

The first thing I want to talk about is something that I haven't done this year, but I did it last year, and it was great! I definitely cannot take credit for it, but I will provide the link. 

http://www.geosociety.org/educate/LessonPlans/Layers_of_Atmosphere.pdf


Thank you to Jack Fearing for providing. This is a great activity!

This activity helps to teach the layers of the atmosphere. Students will have to graph points, which will ultimately show the patterns in the atmosphere. From that, students have to determine where each layer begins and explain how they can tell. It can be a little challenging for those students who cannot plot points well, but overall, it is a wonderful activity and visual tool to remember the layers of the atmosphere! I love it!


In math class yesterday, I did one of my "closures" at the end of class. It is called a "Snowball Fight". I have never in my life seen students so excited that they were able to throw a piece of paper across the room. Their faces were priceless, and they were SO into it! I had them to get out a piece of paper, write down a problem like the ones that we did that day. We were working on adding and subtracting integers, so they could have written 6 x (-7). They were not to write an answer, but then to ball the paper up and throw it across the room. They then had to pick another one up and answer it. I was so proud :)


I have created closure cards with 50 different closures, including the snowball fight! They are on sale on my TpT and TN sites. They are great for filling in the end of class and lesson plans!


Sunday, August 18, 2013

The Most Horrible Blogger Ever!

I know that I must be the most horrible blogger ever! Once the school year was over, I vanished!

Well, I will just have to say that I had an amazing summer, and it was super busy! I got married!!!! It was fabulous! After the wedding, I also took on a summer job. With all this excitement going on in my life, I forgot to update my blog. I'm so horrible!

To make up for lost time, I will try to update more often this school year. I hope that I will have some very exciting things to share. I officially start back tomorrow. I can't believe it!!! I have been out to the school a few times already to make sure I'm ahead of the game. I got very lucky in that I actually got to keep the same classroom that I was in last year. That's pretty exciting! I tried to switch things up just a little bit because change can be good! 


I, of course, stole this idea from Pinterest! It is just so cute! You place two file cabinets back to back and cover with fabric and border. Then, you have yourself a magnet board! 

Above the file cabinets was my life saver my second year teaching. In the bins on the left, I place all of my "not graded" work, and then once graded, I place them in the bins to the right. They are also separated by classes! Simple and it works!


I decided to go with hot pink duct tape for my homework section this year. They can't miss that! The board is not quite done yet, but the hard part is out of the way.


This is the same from last year, different border, but it's my science word wall! You can get these at my TpT store.


I also decided to place my big ideas for math on my bulletin board this year. This was so much easier than taping like I did last year.


Don't forget that TpT is throwing a great sale, and my store as an additional 20%!